Introduction
Learning computer programming would be far more difficult without the tools that have evolved to streamline the process. One of the most essential tools for programmers is the Integrated Development Environment (IDE).
An IDE is an application that combines a source code editor, file management system, and tools for organizing software projects. It often integrates with compilers and translators, which convert human-readable code into executable programs. Many IDEs also include debuggers and features for managing external data sources, such as databases or remote services.
In the past, most development tools were expensive, often requiring costly licenses for advanced features. While some companies provided limited free versions, full functionality remained out of reach for many.
Today, this has changed significantly. Many companies now offer free or affordable development tools to encourage adoption. More importantly, the open-source community has revolutionized the field by creating free, high-quality programming tools, languages, and frameworks. Even major corporations like Microsoft have embraced this shift, recognizing the benefits of open access.
As a result, powerful software development resources are now widely available at no cost. This has democratized programming, making it accessible to anyone with the interest and dedication to learn—regardless of financial constraints.
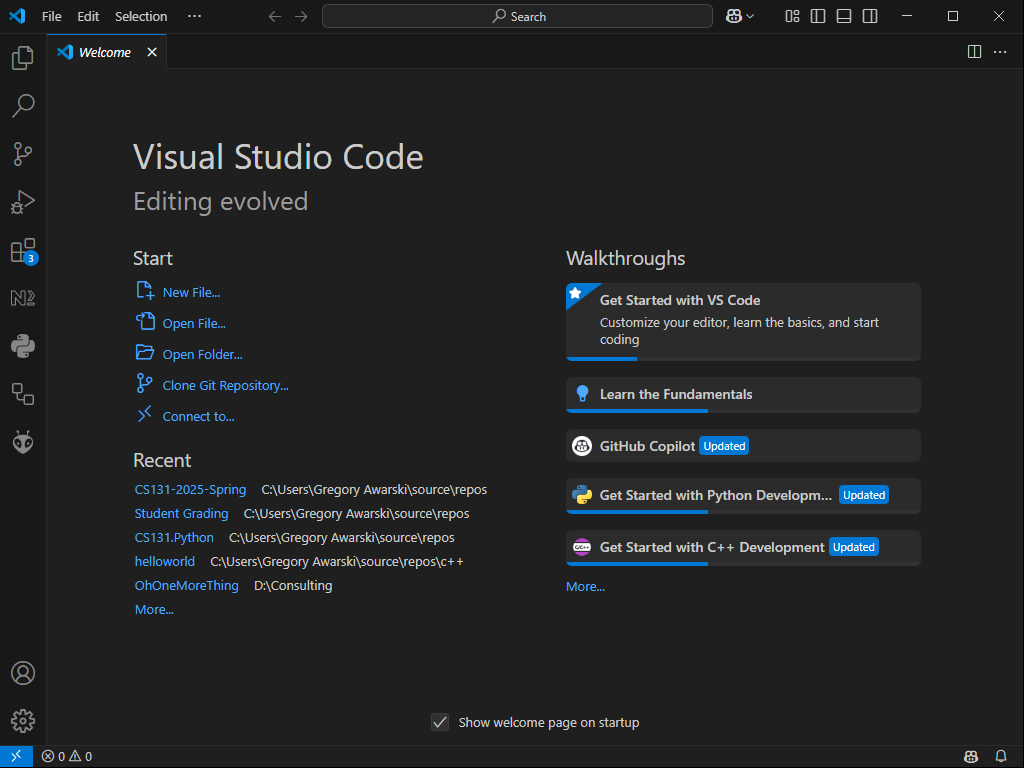
Visual Studio Code
First announced in 2015, Visual Studio Code became an open-source project that November. With contributions from a growing developer community, it quickly evolved and was officially released in April 2016.
Since then, a vast ecosystem of extensions has emerged, enabling development across numerous platforms. While early versions supported over a dozen programming languages, the software now accommodates a massive range—from widely used languages to more niche options.
One major advantage of Visual Studio Code is its consistent structure. Familiarity with its interface allows developers to easily transition between languages and platforms without the learning curve of a new environment.
One of Visual Studio Code’s greatest strengths is its cross-platform availability. It runs seamlessly on Windows, macOS, and even the Raspberry Pi, maintaining a consistent experience across devices. The only notable differences are a few shortcut key variations.
For microelectronics enthusiasts, Visual Studio Code supports any programming language available on the Raspberry Pi, making it a versatile choice for development on this popular platform.
Organization-Owned Equipment
You’ll find this notice on any page covering software installation. Click the button below to open a brief modal with important advice about using organization-provided equipment (e.g., from an employer or school). I recommend reviewing it quickly before proceeding, as I may have updated recommendations.
Downloading and Installing Visual Studio Code
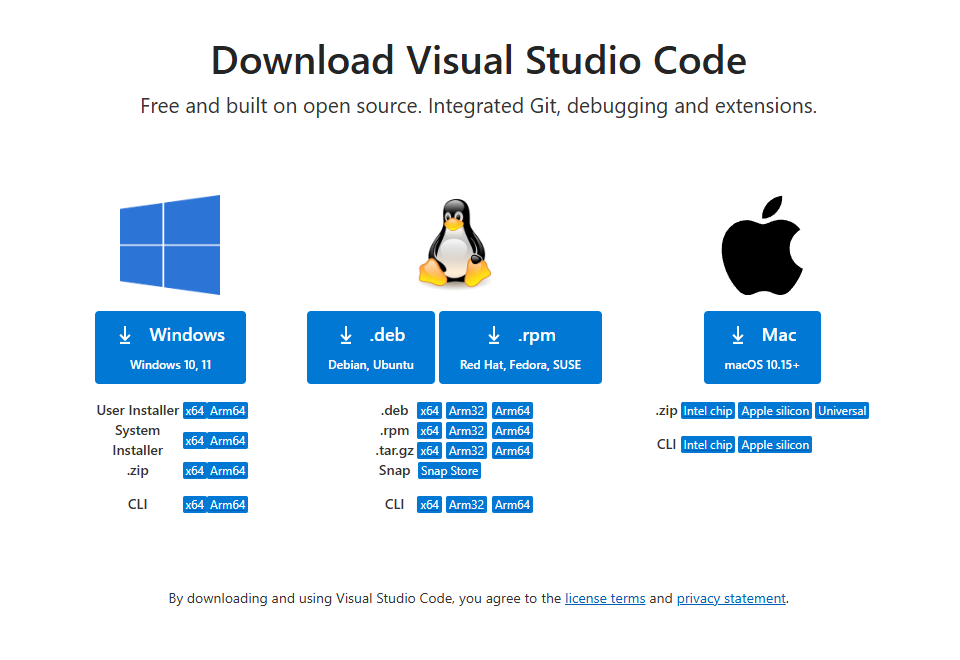
With that important note out of the way, let’s get Visual Studio Code on your computer. Microsoft provides a webpage with all of the currently supported platforms for the Visual Studio Code application. The link opens a new window or tab in your browser.
What version do I want?
I’m assuming that you’re using a computer with Microsoft Windows on it, and that it is a personally-owned machine. If so, the best option will be the link next to “System Installer” marked x64. The reason is that it will be available to any user account on your computer. If you are using Windows 10 or 11, and this is a family computer, that means that each family member’s profile will now have access to the application.
If you’re using a Mac, you just need to make sure of whether or not you’re using one that uses an Intel chip or the newer Apple Silicon. Check the owner’s manual, for your machine. And if in doubt, just use the universal installer.
What if I’m a kid installing this?
On the off chance that you’re a minor child who wants to learn programming, the first thing I’m going to say is “check with mom and dad before you do anything.” That’s not meant as an insult. I encourage you to do this because if your family all is using this computer, then you want to make sure you parents are aware that you’ve installed it. After all, you don’t want them to not know what this application is and remove it and lose work for you!
What if I’m installing this for my minor child?
If you and your child don’t mind everyone in the household being able to use this software, you can just install the system version. If you are concerned with restricting access to just a particular person, you can sign onto their account and use the “user installer” version instead.
So what is the user installer?
The short version is that the user installer version is put into the account of the person who specifically runs the install. That means some functions which would require full administrative permissions on the computer won’t run. How important is this? For learning purposes, it’ll probably not be a concern. There’s not a lot of lessons that would require that level of access. By the time you’d be doing that level of work, you’ll probably be a professional with experience and a machine dedicated to doing this work.
So why bother with the system one at all? The key benefit is maintenance. If you install the single system-wide version, an update will be automatically applied across the board. If you have a family computer set up with user accounts for each kid, those accounts would likely have been set up to prevent security risks anyway. In most cases, the system version installed universally is the best bet. I recommend that approach in most cases. But for everything you will likely find on my site, it’s not something to spend a lot of time worrying about.
Download either one, and you should be fine. If you truly prefer, get the user one. You can always remove it and install the system-wide version later if you find a need. The process will be essentially the same here no matter what.
Installing Visual Studio Code
After you’ve downloaded one of the versions of the installer for Visual Studio Code, you can run it by going to the Downloads folder on your computer, or through your browser. After you click on the icon to launch that application, you may get a warning about administrative security permissions. The exact message will vary a bit depending on the operating system you use and what version you’re on. If you’ve downloaded the user version on Windows instead of the system version, you likely won’t see that warning.
The general gist of the message for the system version is just a note that the package is being installed in such a way that it will be making changes at the system level. This is normal. Because the package is being installed in such a way that anyone who uses your computer is being granted access, it needs to install the program in a shared location. This is perfectly normal, so don’t panic. If you don’t feel comfortable about that, it’s fine. Just cancel the installation, go back and get the user version of the installer, repeat the process for downloading and starting the file up, and you can continue on.
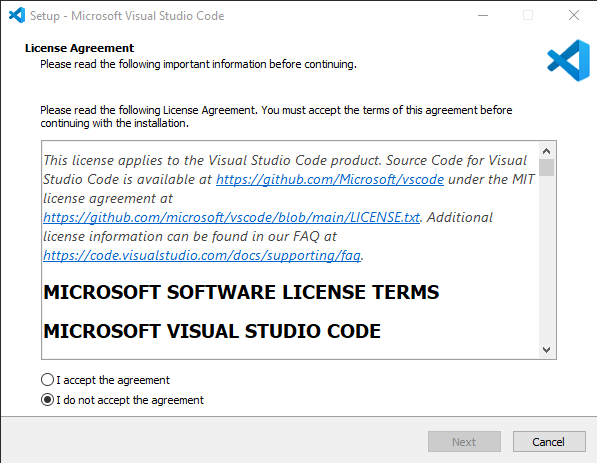
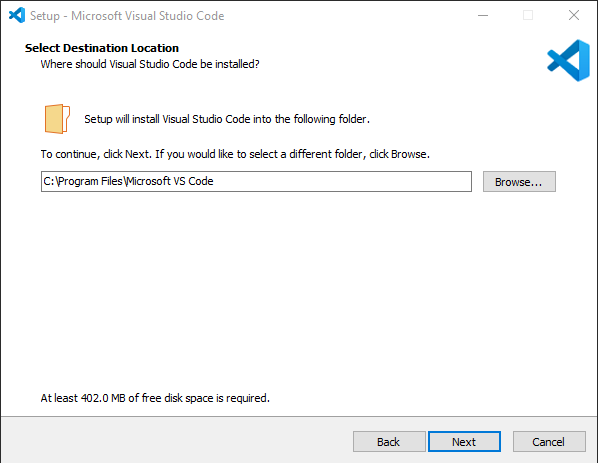
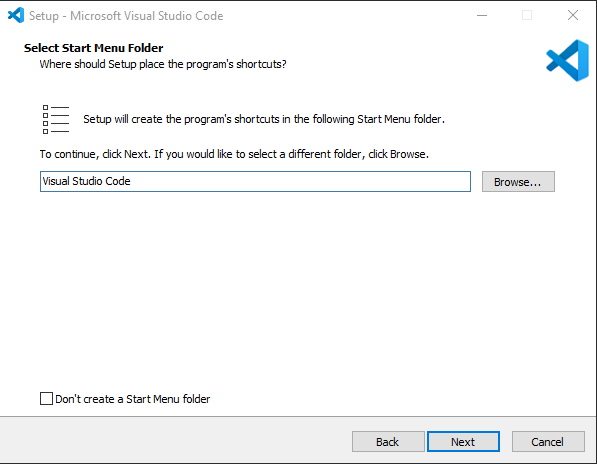
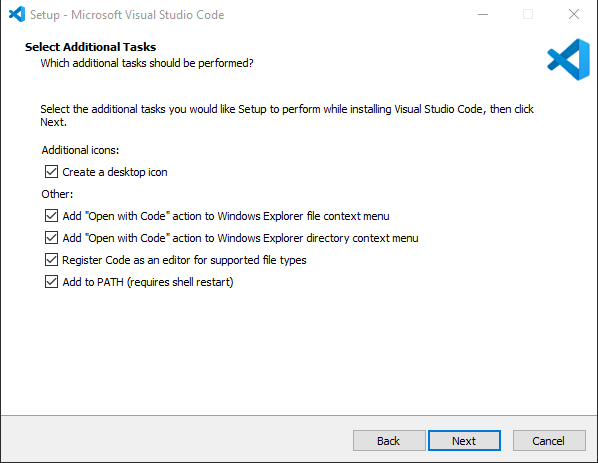
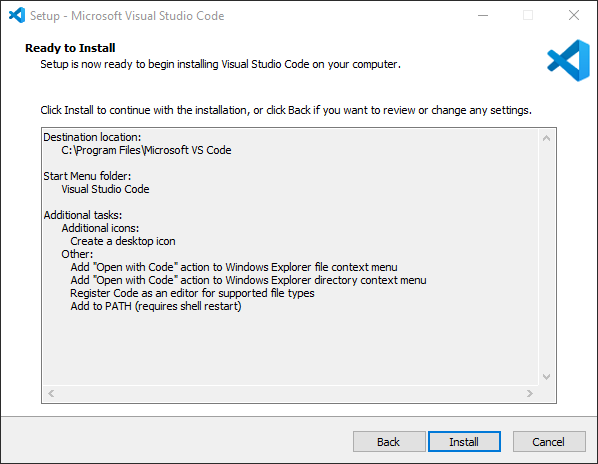
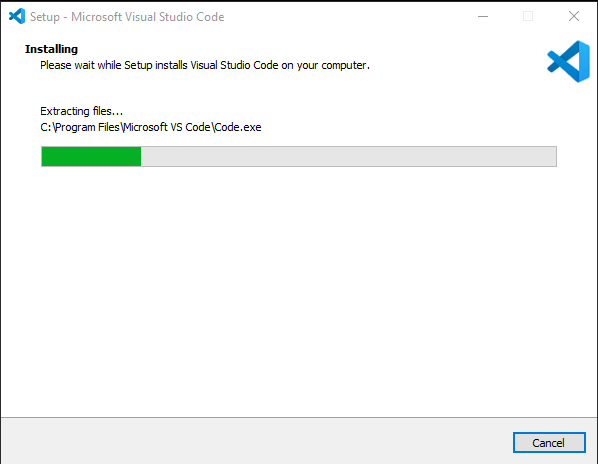
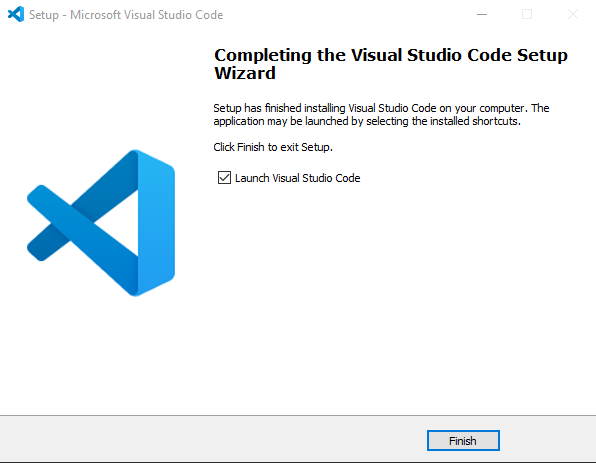
What follows are a series of images that will let you set up your copy of Visual Studio Code. There might be differences on some aspects, but by and large, the installation will match what you see in these images.
OK - Now What?
This is a good place to stop for the moment. Your next step will be to determine what programming language and platform you’d like to proceed with. I am currently working on material for lessons with Python and C#.
The instructions for installing the Python SDK are available by clicking this link.
The instructions for installing the .NET SDK which is used for C# are available by clicking this link.
Before you do, though…
Oh, One More Thing
I want to reassure you of something; this is an important step into the world of computer programming. This single article is a prerequisite to nearly everything else on the site. On the one hand it’s a bit wordy. I apologize for that. It’s hard to convey this information and not go crazy with details, and at the same time, I don’t want to have people start doing things without understanding why they’re doing them.
Installing Visual Studio Code (or any IDE, really) is something anyone can easily do, and that’s the point. If you’re nervous about trying to learn the content I’m presenting, then understand that the process you just went through is really as strenuous as anything will ever be. And it’s honestly not stressful at all. This is no different than anything else you’d do in life.
If you consider an analogy, this article was much like the start of learning how to be proficient in your kitchen. We’re going to start learning how to make a sandwich. There’s a number of steps to making a sandwich, but one of the first things you need to do is have a toaster to toast your bread. Sure, you can make a sandwich without toasted bread, but usually people prefer toast, and unpacking and plugging in your toaster is necessary to do that.
So congratulations, you’ve unpacked and plugged in your toaster. If that sounds ridiculously dramatic or extremely underwhelming, that’s because it’s both. And ultimately, it’s how I’m starting you off, because you have to start somewhere – this is what makes sense, at least from my experience.
There is a famous Chinese Proverb:
A journey of a thousand miles begins with a single step.
Whatever you want to do, you always start by taking your first step. Another step will follow. And before long, you’re on your way. The destination will be wherever you want to go – if you have the will to take the first step.